


Using Docksal for Local Development in Drupal 9
- Jonathan Franks

- Jan 6, 2022
- 8 min read
Docksal is a web-development environment based on Docker for macOS, Windows and Ubuntu Linux and it is a great productivity enhancer. It helps developers get sites running quickly and efficiently and easily allows for code- and configuration-reuse.
Creating a Drupal 9 site
Let’s see how easy it is to get a Drupal 9 site going! There’s no need to set up Composer or any application stack - Docksal will handle all of that for us.
From the command line, type fin project create. Then enter the name of your project. We’ll call ours drupal9.
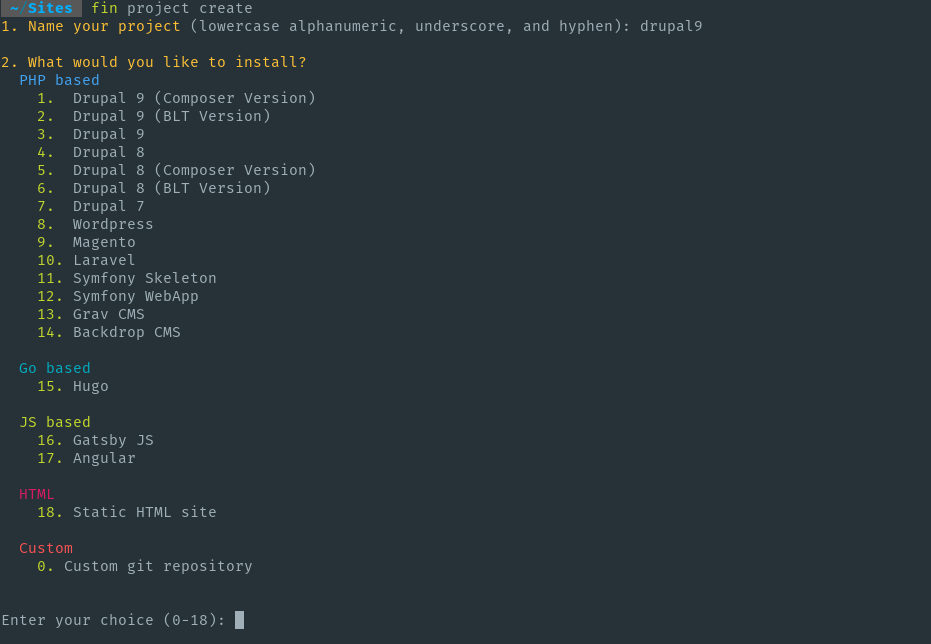
We’ll select option 1 for a Drupal 9 site using Composer for dependencies.

This is correct, so let’s hit Y and move on.
Now Docksal creates new containers for the project. Once it has created the containers, it will use Composer to create the new project. This takes a few minutes, so let it do its thing. Eventually, it will finish.
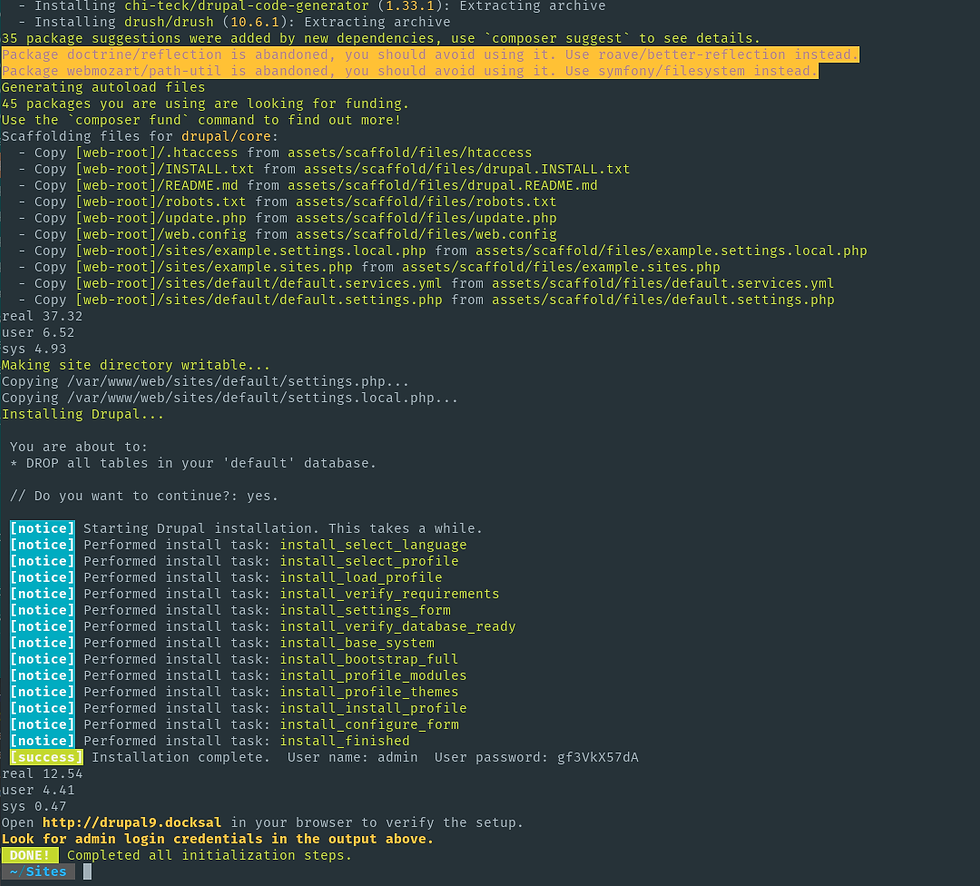
And that’s it! You have a functional Drupal 9 site now!

The end
Just kidding! While that is useful, it isn’t very exciting. Let’s explore some of the other interesting things that we do with Docksal on our projects here at BT.
Debugging
Docksal includes XDebug. All we need to do is let our IDE know what we’re doing so it doesn’t get confused. In this example, we’ll be using PHPStorm.
In your project’s .docksal directory, create a docksal-local.env file containing:
XDEBUG_ENABLED="1"
PHP_IDE_CONFIG="serverName=drupal9.docksal"
We’ll let Docksal know about these changes by restarting the containers. Change directory to your new drupal9 directory, then execute fin up.

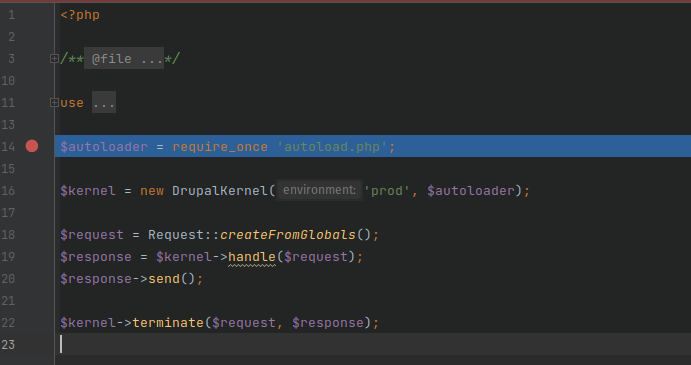
Now open PHPStorm and go to web/index.php. Put a breakpoint on line 14, then PHPStorm will be listening for PHP debug connections.
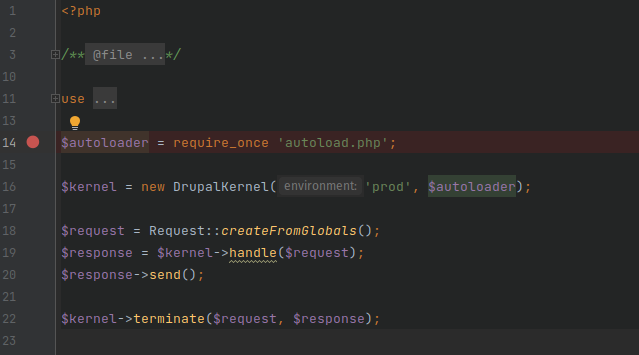
Then browse to your site at http://drupal9.docksal. PHPStorm will try to debug but nothing is set up yet. Open the Debug window, then the Debugger tab.
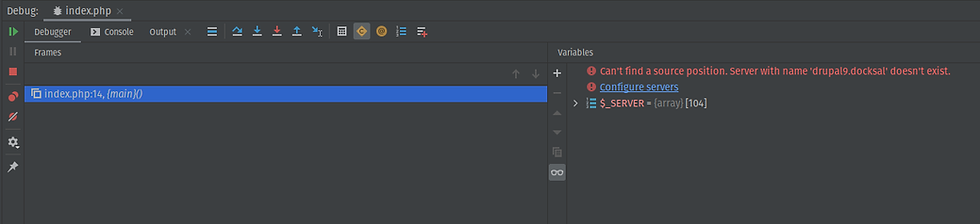
Click the Configure servers link, then hit + to add a new server. For Name and Host, put the host name of your Docksal project: drupal9.docksal. Check the Use path mappings checkbox and specify an absolute path of /var/www on the project directory.
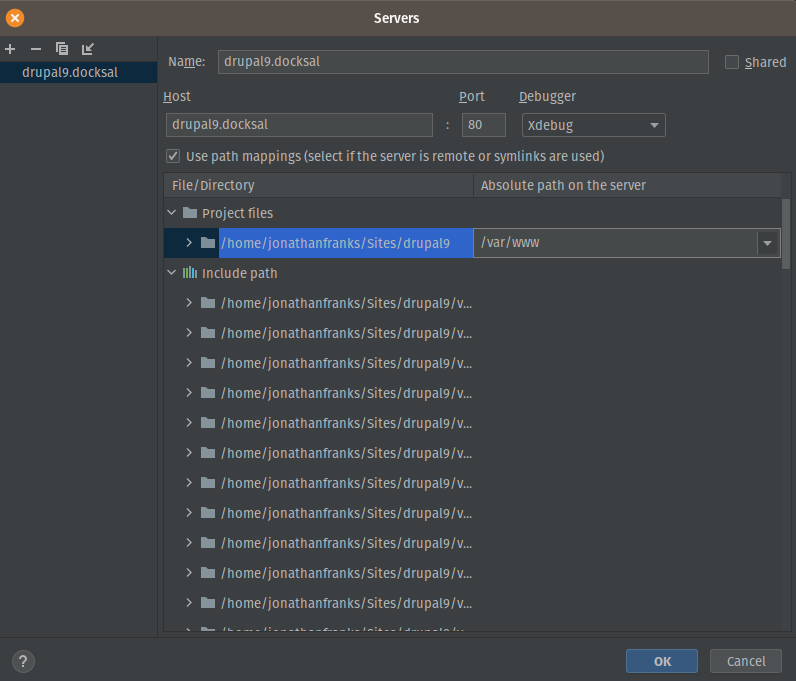
Press OK, refresh the page, and your breakpoint will receive focus!
Let’s remove the breakpoint and resume execution so we can see what else we can do with Docksal.
Using fin
To run cli commands in Docksal, we need to use the fin command.
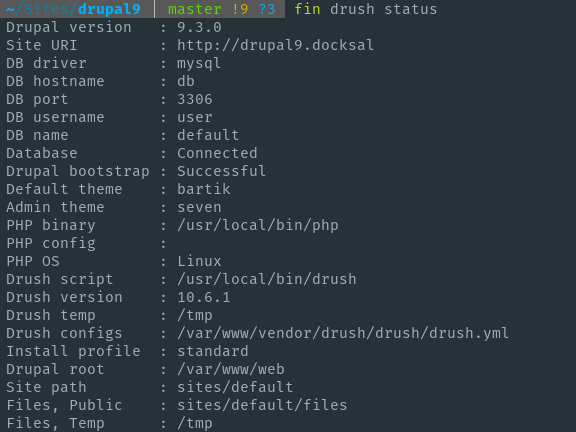
fin drush status
To add a new module, we will use Composer through fin. Docksal includes Composer in each project, so we don’t have to set anything else up to use it.
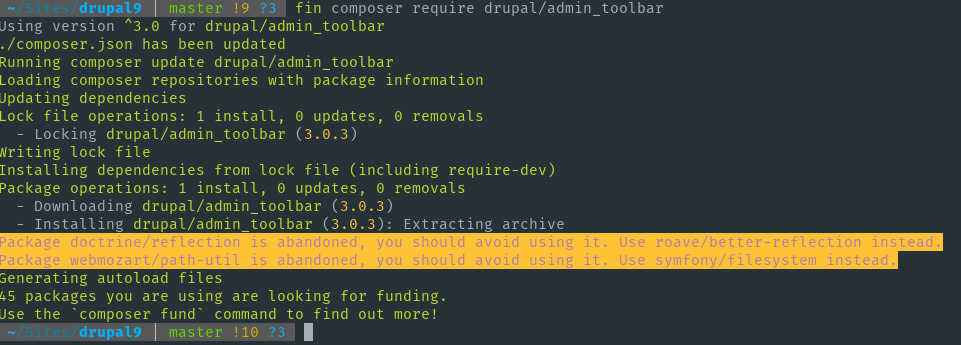
Execute fin composer require drupal/admin_toolbar.
Then enable it with fin drush en -y admin_toolbar admin_toolbar_tools.

The fin command can be used to execute basically any command on the CLI container. If you have node.js dependencies, for instance, you can run fin exec npm install, fin exec npm run build, etc.
Drupal configuration export
We need to tell Drupal where to put our configuration files, so let’s edit both .docksal/settings/settings.local.php and web/sites/default/settings.local.php. We are editing in both places so that we can get this change right now in our currently-installed site and so we can also get it when we install the site from scratch with fin init or fin init-site, which we’ll cover later.
Add the following line to the end of both of those files:
$settings['config_sync_directory'] = '../config/sync';Then run fin drush cex -y to export configuration.
In order to have this work when we continue to re-install the site, we need to make sure our system UUID is the same. Drupal generates a new site UUID during installation, so we need to make sure we’re always using the same one.
Let’s get our current UUID by executing fin drush cget system.site uuid.
It will give an output like this:

Copy the value (in this case, 361b1817-e3cf-4a01-9040-5b98c0797b67) and edit .docksal/commands/init-site. In the default init-site command file, line 89 is drush site-install standard -y --site-name='My Drupal 9 Site'. Add this line underneath that one:
drush cset system.site uuid "361b1817-e3cf-4a01-9040-5b98c0797b67" -yNow every time we initialize the site, we’ll get the same system UUID and we can use our configuration.
Export your configuration now by typing fin drush cex -y.
Testing
Let’s set up Behat in our project. We’ll use Composer to install it and the Drupal extension. Run fin composer require --dev behat/behat drupal/drupal-extension to install Behat and the Drupal extension. This will take a few minutes.
While that is running, let’s create our Behat Docksal command. In your .docksal/commands directory, create a file named behat that contains:
#!/usr/bin/env bash


## Run project's Behat tests.
##
## Usage: fin behat [--path=path] [arguments]
##
## path defaults to tests/behat


# Environment variables passed from fin:
#
#   $PROJECT_ROOT - (string) absolute path to NEAREST .docksal folder
#   $VIRTUAL_HOST - (string) ex. projectname.docksal
#   $DOCROOT - name of the docroot folder
#   $DOCKER_RUNNING - (string) "true" or "false"


params=''
path='tests'
for i in "$@"; do
	case "$i" in
		--path=*)
			path="${i#*=}"
			;;
		*)
			params="$params$i "
			;;
	esac;
done


behat_yml_path="$PROJECT_ROOT/$path/behat.yml"
if [[ ! -f "$behat_yml_path" ]]; then
	echo "Could not find $behat_yml_path"
	exit 1
fi


cd $PROJECT_ROOT
# Launch Behat tests
fin exec "cd $path && ../vendor/bin/behat $params"
This command starts a process on the CLI that changes to the appropriate directory, then runs Behat.
To run Behat tests, we need to configure it, and our command is really configured to execute Behat with a yml file, so we’ll need to go into the CLI for the next step.
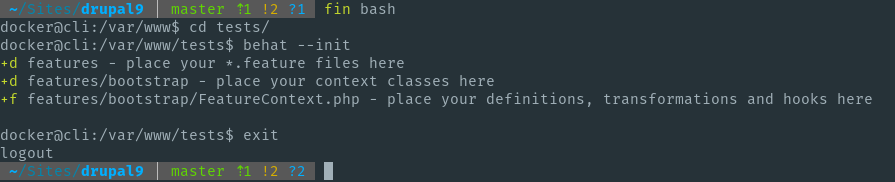
Execute fin bash to open a shell on the CLI.
Then cd tests to go to the tests directory.
Then execute behat --init to create the features and bootstrap directories and the default feature context.
Once that’s done, type exit to get out of the shell back to your host terminal.
Create a tests/behat.yml file that contains:
default:
  suites:
    default:
      contexts:
        - FeatureContext
        - Drupal\DrupalExtension\Context\MinkContext
  extensions:
    Behat\MinkExtension:
      goutte: ~
      base_url: http://web
      default_session: goutte
      files_path: '%paths.base%/testfiles'
    Drupal\DrupalExtension:
      blackbox: ~
      api_driver: 'drupal'
      drupal:
        drupal_root: '/var/www/web'
      drush:
        root: '/var/www/web'
We’re not going to get into a Behat tutorial here, so let’s concentrate on a few Docksal-specific items. First, look at the base_url item. It is set to http://web. Since this will be run by the CLI, it only needs to know what service it will hit when it is executing tests. The web service is named web so that’s all it needs to know.
We also set the Drupal root path and the Drush path so the Drupal extension knows how to bootstrap Drupal.
Since we want to use PHPUnit tests against PHPUnit 9, we need to add a couple of dependencies. See https://www.drupal.org/node/3176567 for more info.
Adding a service
We can add services to our Docksal project. One thing we need to do a lot is run JavaScript/browser tests. Let’s add a Selenium Chromedriver service so we can do that.
Open .docksal/docksal.yml and edit it so it contains this:
version: "2.1"


services:
  browser:
    hostname: browser
    # Pin selenium image to an older version
    # See https://github.com/docksal/docksal/issues/1096#issuecomment-543316840
    image: selenium/standalone-chrome-debug:3.5.0
    dns:
      - ${DOCKSAL_DNS1}
      - ${DOCKSAL_DNS2}
Then execute a fin up from the command line and Docksal will install the new service. You might note that this is an older version of the Chrome driver - we have had to play around with the versions so that we can execute tests in GitHub Actions and not run out of memory (stay tuned for an exciting post about that!).
Since the tests execute in the container, you won’t see Behat open up a browser and manipulate it, but it really does happen in the container.
We need to add a little more configuration so Behat will know how to execute the browser tests. Edit your tests/behat.yml file again and add this to the Behat\MinkExtension section:
browser_name: chrome
selenium2:
wd_host: http://browser:4444/wd/hub
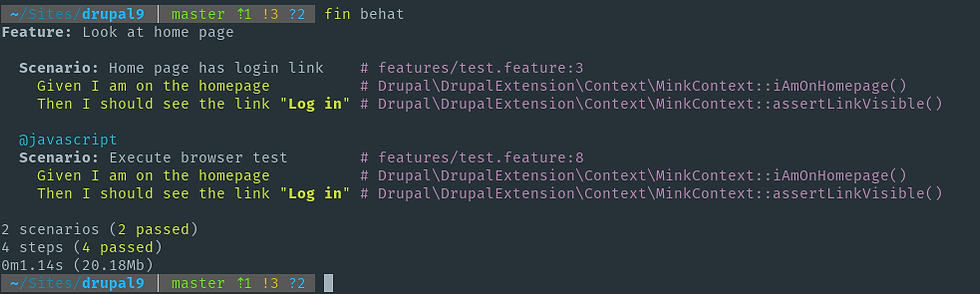
capabilities: { "browser": "chrome", "version": "*", "extra_capabilities":{"idleTimeout":300, "chromeOptions":{"w3c":false}} }Now let’s add a couple of tests. Make a new file tests/features/test.feature and edit it. Let’s add a Javascript test and a non-Javascript test:
Feature: Look at home page


  Scenario: Home page has login link
    Given I am on the homepage
    Then I should see the link "Log in"


  @javascript
  Scenario: Execute browser test
    Given I am on the homepage
    Then I should see the link "Log in"
Now from the command line, execute fin behat.
Success!
Adding Redis as a service
Let’s add another service. We’ll set the caching backend to Redis. To do this, we need to have Redis running in our project, the redis module installed and enabled, and Drupal configured to use the Redis caching backend.
First, let’s install the module. fin composer require drupal/redis will download the module, then fin drush en -y redis.
Now let’s add the Redis service to the project. Edit your .docksal/docksal.yml file and add this to the services: section:
redis:
extends:
file: ${HOME}/.docksal/stacks/services.yml
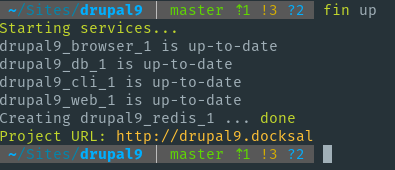
service: redisThen execute fin up from the command line to make Docksal install the new service.
Let’s configure Redis. Edit web/sites/default/settings.local.php and add the following to the end:
$settings['redis.connection']['interface'] = 'PhpRedis';
$settings['redis.connection']['host'] = 'redis';
$settings['cache']['default'] = 'cache.backend.redis';
$settings['redis.connection']['persistent'] = TRUE;
$settings['redis.connection']['read_timeout'] = 15;
$settings['redis.connection']['timeout'] = 20;
$settings['redis_compress_length'] = 100;
Again, this isn’t a tutorial specifically for implementing a Redis cache backend so we won’t be going over the settings here.
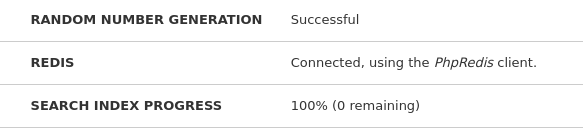
Execute fin drush cr and the cache clears! To check on the status of the Redis service, check out the Status report for your new site.
Now edit .docksal/settings/settings.local.php and add those Redis configuration lines to the end so we get the right settings whenever we initialize a new instance of the site.
Execute fin drush cex -y to export configuration with the Redis module enabled.
Continuing development
Now you have a fully-functional Drupal 9 site running in Docksal and testable with Behat! You can add additional services to the project if you want, such as Solr, Varnish, or Blackfire, or simply continue your development work as it is. Adding and managing additional services and modules is easy, and since Docksal for OSX has an option to run against a DockerVM setup, it is pretty quick.
Now that you have your site containerized, getting another developer running in the project is very easy. Docksal gave us the init and init-site commands, and we modified init-site to use the UUID we specified earlier. Now let’s make sure another developer can get up and running quickly.
Drupal 8 and 9 have another annoying issue in the Shortcut module. If you are exporting shortcut entities (and we are, since we installed the site and immediately exported configuration without changing anything), we have to remove the existing Shortcut entities before importing new ones. We will use drush to call the EntityTypeManager to delete those entities. (This has nothing to do with Docksal, it’s a Drupal thing.) Then we want to import the configuration so we can get our site running the way we want it.
Edit .docksal/commands/init-site and add new lines containing the shortcut entity deletion and the configuration import under the line we added earlier, like so:
drush cset system.site uuid "361b1817-e3cf-4a01-9040-5b98c0797b67" -y
drush ev '\Drupal::entityTypeManager()->getStorage("shortcut_set")->load("default")->delete();'
drush cim -y
We have to do a little more work to make sure that we can run a fresh install and then change to a Redis backend, otherwise it tries to do the installation against a Redis backend when the Redis module isn’t installed yet.
Copy .docksal/settings/settings.local.php to .docksal/settings/settings.local.noredis.php and remove these lines from the new settings.local.noredis.php file:
$settings['redis.connection']['interface'] = 'PhpRedis';
$settings['redis.connection']['host'] = 'redis';
$settings['cache']['default'] = 'cache.backend.redis';
$settings['redis.connection']['persistent'] = TRUE;
$settings['redis.connection']['read_timeout'] = 15;
$settings['redis.connection']['timeout'] = 20;
$settings['redis_compress_length'] = 100;
Let’s tell the init-site command to use the non-Redis version of the file for installation, and then we’ll copy in the Redis version. Modify .docksal/commands/init-site again and update the init_settings function (typos and comments are part of the Docksal-generated command files, not something we’re introducing):
init_settings ()
{
	# drupal-composer/drupal-project creates settings.php from default.settings.php.
	# Since we supply our own settings.php below, we have to drop the default file first.
	# TODO: Uncomment the local config (settings.local.php) include section in settings.php inline instead.
	# That'a the only change we need in the stock settings.php
	rm -f "${SITEDIR_PATH}/settings.php"
	# Since we are using a Redis cache backend, we have to do our installation with the
	# standard cache back-end and then turn on Redis settings after installation.
	rm -f "${SITEDIR_PATH}/settings.local.php"


	copy_settings_file "${PROJECT_ROOT}/.docksal/settings/settings.php" "${SITEDIR_PATH}/settings.php"
	copy_settings_file "${PROJECT_ROOT}/.docksal/settings/settings.local.noredis.php" "${SITEDIR_PATH}/settings.local.php"
}
And edit the site_install function:
site_install ()
{
	cd "$DOCROOT_PATH"


	echo-green "Installing Drupal..."
	drush site-install standard -y --site-name='My Drupal 9 Site'
	drush cset system.site uuid "361b1817-e3cf-4a01-9040-5b98c0797b67" -y
	drush ev '\Drupal::entityTypeManager()->getStorage("shortcut_set")->load("default")->delete();'
	drush cim -y


  rm -f "${SITEDIR_PATH}/settings.local.php"
	copy_settings_file "${PROJECT_ROOT}/.docksal/settings/settings.local.php" "${SITEDIR_PATH}/settings.local.php"
}
Now when you execute fin init or fin init-site, it will install the site, set the appropriate UUID to the config value, and then import config. Now every other team member can pull down the code, run fin init, and be running exactly the same site on Docksal!
You can find this project on GitHub at https://github.com/jonathanfranks/docksal_drupal9.


Comments